Appearance
Bootstrap
Bootstrap概述
Bootstrap简介
- Bootstrap 是由 Twitter 的 Mark Otto 和 Jacob Thornton 开发的;
- Bootstrap 是 2011 年八月在 GitHub 上发布的开源产品;【GitHub:托管代码的网站】
- Bootstrap,基于 HTML、CSS、JAVASCRIPT 的前端框架(半成品)。其预定义一套 CSS 样式和与样式对应的 jQuery 代码,我们只需要提供固定 HTML 结构,添加固定的 class 样式,就可以完成指定效果的实现;
为什么要使用Bootstrap
- Bootstrap 是最受欢迎的 HTML、CSS 和 JS 框架;
- 用于开发响应式布局、移动设备优先的 WEB 项目;
- 提高开发效率;
关于响应式布局
响应式布局 :一个网站能够兼容多个终端(手机,iPad 等),而不需要为每个终端做一个特定的版本。此概念是为解决移动互联网浏览而诞生的;
为什么要用响应式布局 :响应式布局能够为不同终端的用户提供更加舒适的界面和更好的用户体验,而且随着大屏幕移动设备的普及,用“大势所趋”来形容也不为过。随着越来越多的设计师采用了这个技术,我们不仅看到很多的创新,还看到一些成形的模式;
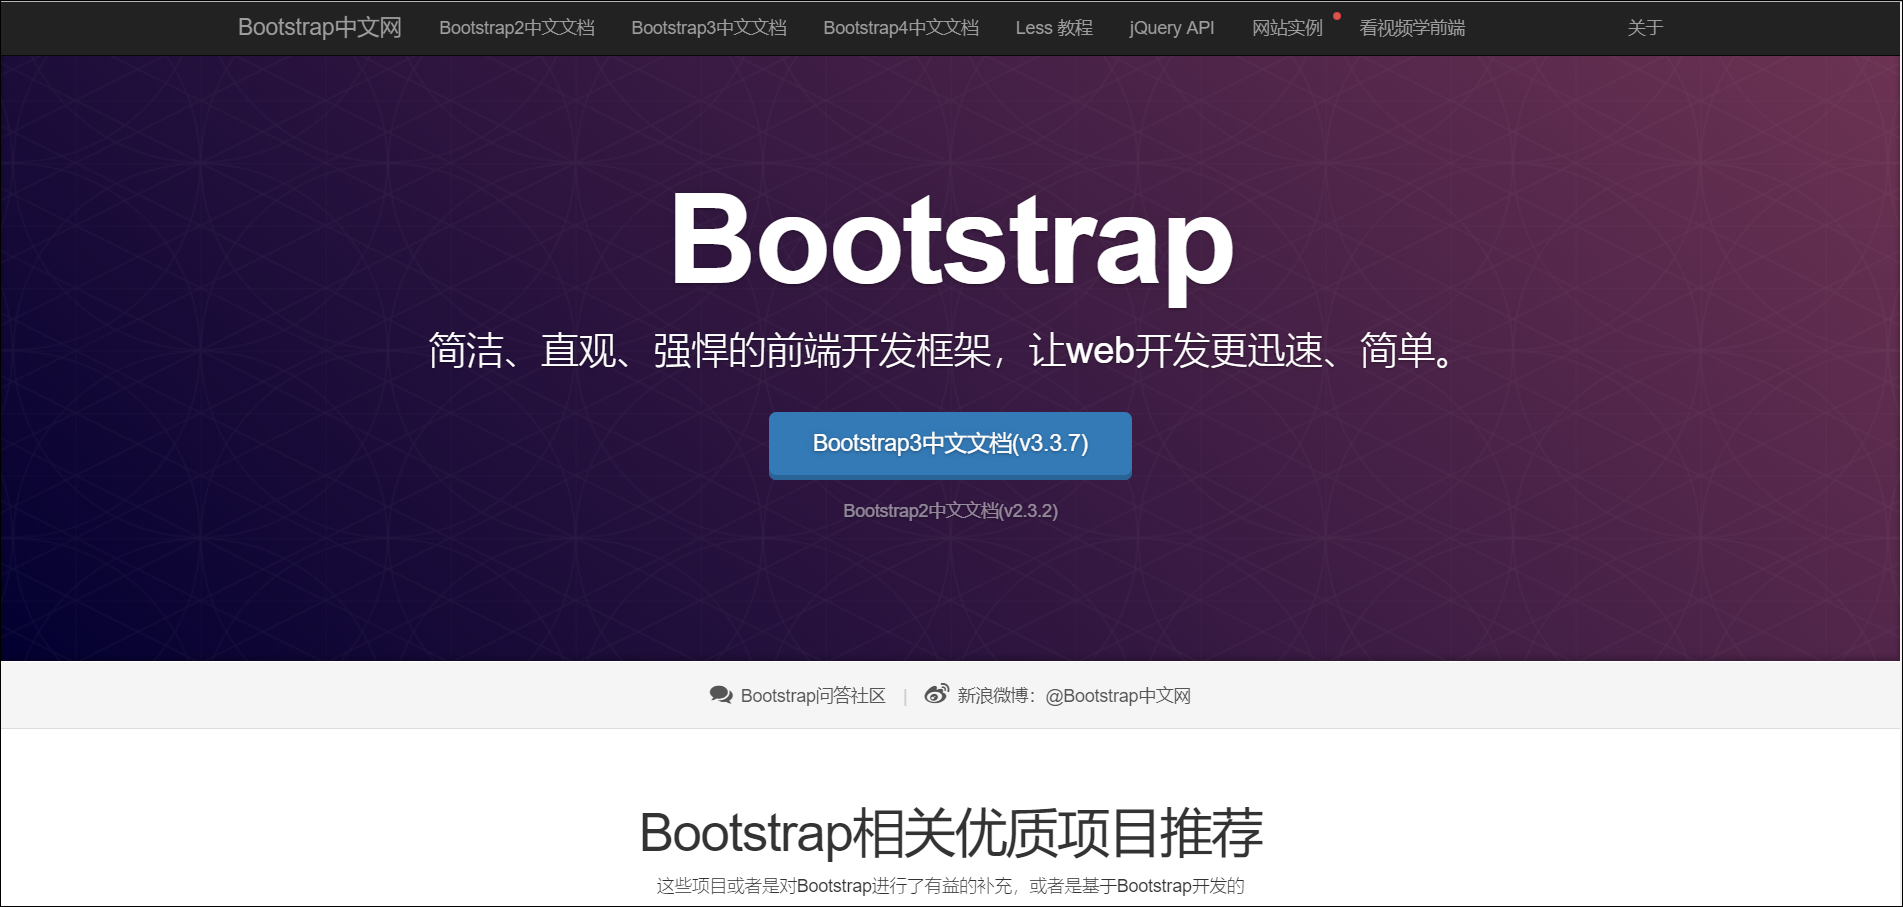
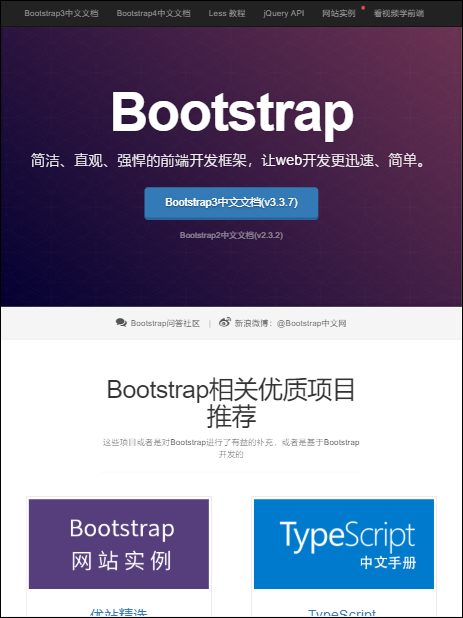
BootStrap的响应式 :BootStrap 就是响应式布局最成功的的实现,为了兼容不同的浏览器采用 jQuery,为了适配不同的终端采用 CSS3 Media Query(媒体查询);如下:
pc 端 BootStrap 官网:
pad 端 BootStrap 官网:
移动端 BootStrap 官网:
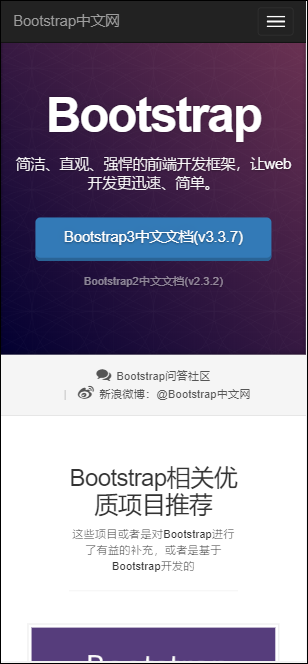
同一个页面在不同的终端上不会出现浏览困难,用户体验好。
Bootstrap入门
环境搭建
- BootStrap 中文官网下载地址:http://www.bootcss.com/
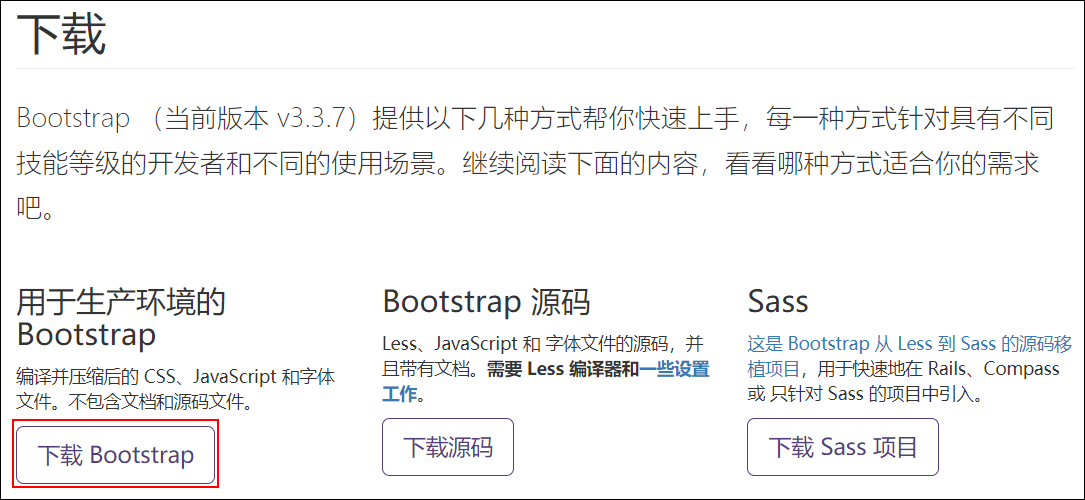
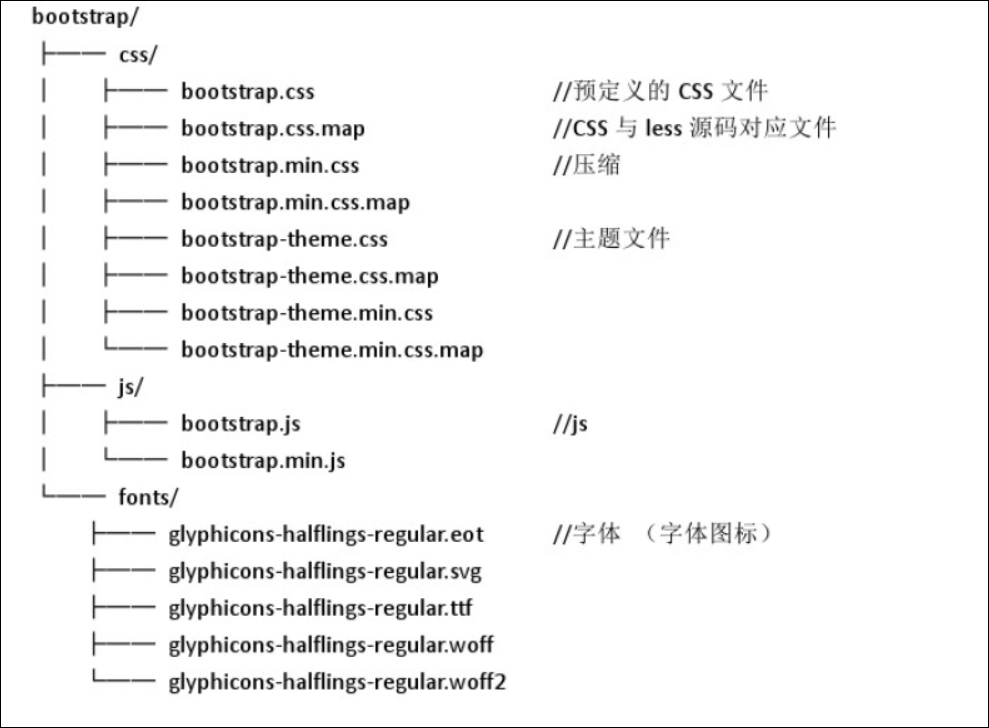
- BootStrap 类库目录结构

Bootstrap基本模板
使用以下给出的这份超级简单的 HTML 模版,或者修改这些实例。我们强烈建议你对这些实例按照自己的需求进行修改,而不要简单的复制、粘贴。
拷贝并粘贴下面给出的 HTML 代码,这就是一个最简单的 Bootstrap 页面了。
html
<!DOCTYPE html>
<html lang="zh-CN">
  <head>
    <!--指定网页的编码集为UTF-8-->
    <meta charset="utf-8">
    <!--如果使用ie浏览器打开网页则使用微软最新的浏览器Edge内核来渲染页面-->
    <meta http-equiv="X-UA-Compatible" content="IE=edge">
    <!--
      响应式布局参数:
      viewport: 视口的参数
      width=device-width:默认的网页宽度是设备的宽度
      initial-scale=1: 初始的缩放比1:1
      -->
    <meta name="viewport" content="width=device-width, initial-scale=1">
<!-- 上述3个meta标签*必须*放在最前面,任何其他内容都*必须*跟随其后! -->
    <title>Bootstrap 101 Template</title>

    <!-- Bootstrap -->
    <link href="../css/bootstrap.min.css" rel="stylesheet">

    <!-- HTML5 shim 和 Respond.js 是为了让 IE8 支持 HTML5 元素和媒体查询(media queries)功能 -->
    <!-- 警告:通过 file:// 协议(就是直接将 html 页面拖拽到浏览器中)访问页面时 Respond.js 不起作用 -->
    <!--[if lt IE 9]>
      <script src="https://cdn.bootcss.com/html5shiv/3.7.3/html5shiv.min.js"></script>
      <script src="https://cdn.bootcss.com/respond.js/1.4.2/respond.min.js"></script>
    <![endif]-->
  </head>
 <body>
<h1>你好,世界!</h1>

<!-- jQuery (Bootstrap 的所有 JavaScript 插件都依赖 jQuery,所以必须放在前边) -->
<script src="../js/jquery-3.3.1.js"></script>
<!-- 加载 Bootstrap 的所有 JavaScript 插件。你也可以根据需要只加载单个插件。 -->
<script src="../js/bootstrap.js"></script>
</body>
</html>BootStrap核心学习
全局CSS样式

基本的 HTML 元素均可以通过 class 设置样式并得到增强效果;
布局容器
BootStrap 需要为页面内容包裹一个.container容器 。我们提供了两个作此用处的类。注意,由于 padding 等属性的原因,这两种 容器类不能互相嵌套。
.container 类用于固定宽度并支持响应式布局的容器。
html
<div class="container">
  ...
</div>.container-fluid 类用于 100% 宽度,占据全部视口(viewport)的容器。
html
<div class="container-fluid">
  ...
</div>.container 和.container-fluid 的样式参数:
css
.container {
  padding-right: 15px;
  padding-left: 15px;
  margin-right: auto;
  margin-left: auto;
}
.container-fluid {
  padding-right: 15px;
  padding-left: 15px;
  margin-right: auto;
  margin-left: auto;
}【对比】
.container容器会随着屏幕的大小变化而变化, 去适配不同区间屏幕;.container-fluid相当于就是设置 宽度 100%,多用于移动端宽度撑满整个容器;.container用于响应式布局,.container-fluid多用于移动端宽度撑满整个容器,.container布局用的比较多 ;
媒体查询【了解】
BootStrap 中媒体查询的作用:
- 获取不同屏幕的尺寸信息;
- 根据不同屏幕尺寸设置不同的样式;
css
/* 超小屏幕(手机,小于 768px) */
/* 没有任何媒体查询相关的代码,因为这在 Bootstrap 中是默认的(还记得 Bootstrap 是移动设备优先的吗?) */

/* 小屏幕(平板 wd>=768px & wd<992) */
@media (min-width: @screen-sm-min) { ... }

/* 中等屏幕(桌面显示器 wd>=992px & wd<1200px) */
@media (min-width: @screen-md-min) { ... }

/* 大屏幕(大桌面显示器 wd>=1200px) */
@media (min-width: @screen-lg-min) { ... }什么是栅格系统
我们之前的注册表单的布局----table 表格布局:
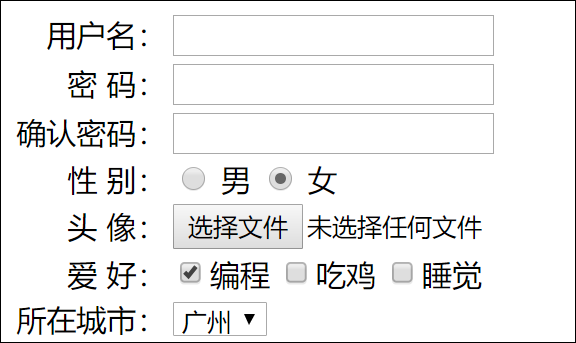
我们习惯于使用表格来给页面画格子,方便我们整齐有序地将内容填充到页面,但是每次自己画格子,太麻烦,所以 Bootstrap 提供了一个写好的“表格”给我们使用——这个就是栅格系统。
Bootstrap 栅格系统发挥两个作用:
1、对页面进行布局;
2、根据设备屏幕,自动调节内容的排列;
栅格系统快速入门【重要】
栅格系统用于通过一系列的行(row)与列(column)的组合来创建页面布局,你的内容就可以放入这些创建好的布局中。下面就介绍一下 Bootstrap 栅格系统的工作原理:
- “行(row)”必须包含在
.container(固定宽度)或.container-fluid(100% 宽度)中,以便为其赋予合适的排列(aligment)和内补(padding)。 - 通过“行(row)”在水平方向创建一组“列(column)”。
- 你的内容应当放置于“列(column)”内,并且,只有“列(column)”可以作为行(row)”的直接子元素。
- 栅格系统中的列是通过指定 1 到 12 的值来表示其跨越的范围。例如,三个等宽的列可以使用三个
.col-xs-4来创建。 - 如果一“行(row)”中包含了的“列(column)”大于 12,多余的“列(column)”所在的元素将被作为一个整体另起一行排列。
- 类似
.row和.col-xs-4这种预定义的类,可以用来快速创建栅格布局。
【入门案例】
栅格:为了防止以前的表格,会出现,网页缩小,内容跟着缩小的缺点。栅格系统可以根据当前页面大小,去改变栅格中的数据排列组合方式。
如果页面变小,将栅格内容,从横向排列改成纵向排列。
需求:按照如图所示,画出格子

【素材样式】
css
<style type="text/css">
 div{
     border: 1px solid red;
 }
</style>【代码】
html
<!DOCTYPE html>
<html lang="zh-CN">

 <head>
  <meta charset="utf-8">
  <meta http-equiv="X-UA-Compatible" content="IE=edge">
  <meta name="viewport" content="width=device-width, initial-scale=1">
  <title></title>
  <link href="../css/bootstrap.min.css" rel="stylesheet">
  <style type="text/css">
   div {
    border: 1px solid red;
   }
  </style>
 </head>
 <body>

  <div class="container">
   <div class="row">
    <div class="col-md-1">.col-md-1</div>
    <div class="col-md-1">.col-md-1</div>
    <div class="col-md-1">.col-md-1</div>
    <div class="col-md-1">.col-md-1</div>
    <div class="col-md-1">.col-md-1</div>
    <div class="col-md-1">.col-md-1</div>
    <div class="col-md-1">.col-md-1</div>
    <div class="col-md-1">.col-md-1</div>
    <div class="col-md-1">.col-md-1</div>
    <div class="col-md-1">.col-md-1</div>
    <div class="col-md-1">.col-md-1</div>
    <div class="col-md-1">.col-md-1</div>
   </div>
   <div class="row">
    <div class="col-md-8">.col-md-8</div>
    <div class="col-md-4">.col-md-4</div>
   </div>
   <div class="row">
    <div class="col-md-4">.col-md-4</div>
    <div class="col-md-4">.col-md-4</div>
    <div class="col-md-4">.col-md-4</div>
   </div>
   <div class="row">
    <div class="col-md-6">.col-md-6</div>
    <div class="col-md-6">.col-md-6</div>
   </div>
  </div>

  <script type="text/javascript" src="../js/jquery-3.3.1.js" ></script>
  <script src="../js/bootstrap.min.js"></script>
 </body>
</html>栅格参数
【移动设备和桌面屏幕】
html
<!-- Stack the columns on mobile by making one full-width and the other half-width -->
<div class="row">
  <div class="col-xs-12 col-md-8">.col-xs-12 .col-md-8</div>
  <div class="col-xs-6 col-md-4">.col-xs-6 .col-md-4</div>
</div>

<!-- Columns start at 50% wide on mobile and bump up to 33.3% wide on desktop -->
<div class="row">
  <div class="col-xs-6 col-md-4">.col-xs-6 .col-md-4</div>
  <div class="col-xs-6 col-md-4">.col-xs-6 .col-md-4</div>
  <div class="col-xs-6 col-md-4">.col-xs-6 .col-md-4</div>
</div>

<!-- Columns are always 50% wide, on mobile and desktop -->
<div class="row">
  <div class="col-xs-6">.col-xs-6</div>
  <div class="col-xs-6">.col-xs-6</div>
</div>【手机、平板、桌面】
html
<div class="row">
  <div class="col-xs-12 col-sm-6 col-md-8">.col-xs-12 .col-sm-6 .col-md-8</div>
  <div class="col-xs-6 col-md-4">.col-xs-6 .col-md-4</div>
</div>
<div class="row">
  <div class="col-xs-6 col-sm-4">.col-xs-6 .col-sm-4</div>
  <div class="col-xs-6 col-sm-4">.col-xs-6 .col-sm-4</div>
  <!-- Optional: clear the XS cols if their content doesn't match in height -->
  <div class="clearfix visible-xs-block"></div>
  <div class="col-xs-6 col-sm-4">.col-xs-6 .col-sm-4</div>
</div>排版
标题
HTML 中的所有标题标签,<h1> 到 <h6> 均可使用。另外,还提供了 .h1 到 .h6 类,为的是给内联(inline)属性的文本赋予标题的样式。
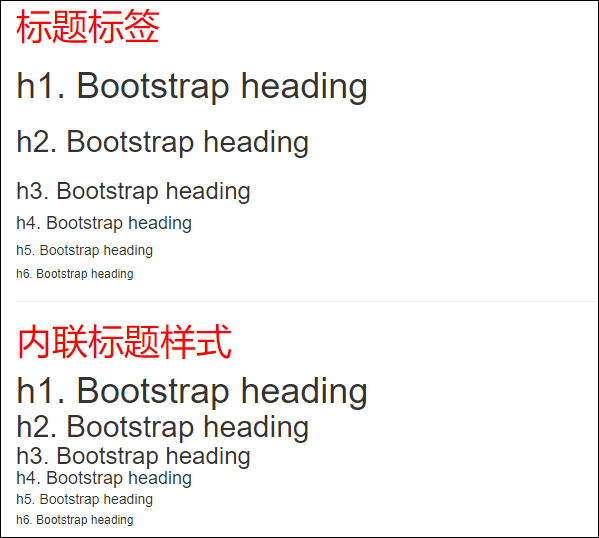
【代码】
html
<!--标题标签-->
<h1 style="color: red;">标题标签</h1>
<h1>h1. Bootstrap heading</h1>
<h2>h2. Bootstrap heading</h2>
<h3>h3. Bootstrap heading</h3>
<h4>h4. Bootstrap heading</h4>
<h5>h5. Bootstrap heading</h5>
<h6>h6. Bootstrap heading</h6>
<hr>
<!--标题样式-->
<h1 style="color: red">内联标题样式</h1>
<span class="h1">h1. Bootstrap heading</span><br>
<span class="h2">h2. Bootstrap heading</span><br>
<span class="h3">h3. Bootstrap heading</span><br>
<span class="h4">h4. Bootstrap heading</span><br>
<span class="h5">h5. Bootstrap heading</span><br>
<span class="h6">h6. Bootstrap heading</span><br>在标题内还可以包含 <small> 标签或赋予 .small 类的元素,可以用来标记副标题。
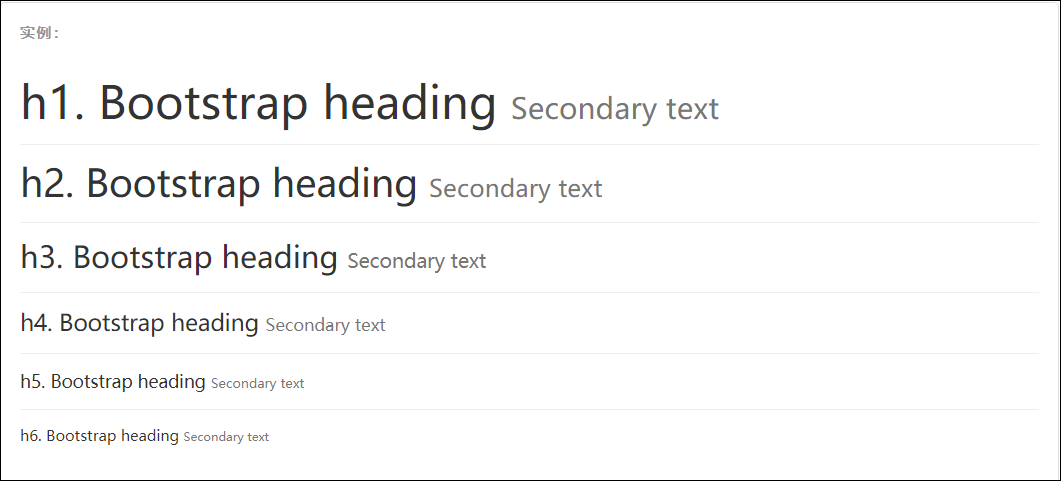
html
<h1>h1. Bootstrap heading <small>Secondary text</small></h1>
<h2>h2. Bootstrap heading <small>Secondary text</small></h2>
<h3>h3. Bootstrap heading <small>Secondary text</small></h3>
<h4>h4. Bootstrap heading <small>Secondary text</small></h4>
<h5>h5. Bootstrap heading <small>Secondary text</small></h5>
<h6>h6. Bootstrap heading <small>Secondary text</small></h6>文字对齐方式
通过文本对齐类,可以简单方便的将文字重新对齐。
| 样式名(class属性值) | 说明 |
|---|---|
| .text-left | 设定文本左对齐 |
| .text-center | 设定文本居中对齐 |
| .text-right | 设定文本右对齐 |
| .text-justify | 设定文本对齐,段落中超出屏幕部分文字自动换行 |
| .text-nowrap | 段落中超出屏幕部分不换行 |
html
 <p class="text-left">我居左</p>
   <p class="text-center">我居中</p>
   <p class="text-right">我居右</p>
   <!--
				两端对齐:设定文本对齐,段落中超出屏幕部分文字自动换行
			-->
   <p class="text-justify">
   </p>
   <!--
				不被包裹:段落中超出屏幕部分不换行
			-->
   <p class="text-nowrap">
</p>内联列表
通过设置 display: inline-block; 并添加少量的内补(padding),将所有元素放置于同一行。
【代码示例】
html
<ol >
  <li>future-weaver</li>
  <li>百度</li>
  <li>淘宝</li>
</ol>
<hr />
<ol class="list-inline">
  <li>future-weaver</li>
  <li>百度</li>
  <li>淘宝</li>
</ol>表格
为任意 <table> 标签添加 .table 类可以为其赋予基本的样式 — 少量的内补(padding)和水平方向的分隔线。这种方式看起来很多余!?但是我们觉得,表格元素使用的很广泛,如果我们为其赋予默认样式可能会影响例如日历和日期选择之类的插件,所以我们选择将此样式独立出来。
基本表格

html
<table class="table">
  ...
</table>【代码示例】
html
<table class="table">
    <caption>可选的表格标题</caption>
    <tr>
      <th>序号</th>
      <th>姓名</th>
      <th>手机号</th>
    </tr>
    <tr>
      <th >1</th>
      <td>Mark</td>
      <td>13333333333</td>
    </tr>
    <tr>
      <th >2</th>
      <td>Jacob</td>
      <td>13333333334</td>
    </tr>
    <tr>
      <th >3</th>
      <td>Larry</td>
      <td>13333333335</td>
    </tr>
</table>条纹状表格

html
<table class="table table-striped">
  ...
</table>【代码示例】
html
<table class="table table-striped">
   <caption>可选的表格标题</caption>
   <tr>
    <th>序号</th>
    <th>姓名</th>
    <th>手机号</th>
   </tr>
   <tr>
    <th >1</th>
    <td>Mark</td>
    <td>13333333333</td>
   </tr>
   <tr>
    <th >2</th>
    <td>Jacob</td>
    <td>13333333334</td>
   </tr>
   <tr>
    <th >3</th>
    <td>Larry</td>
    <td>13333333335</td>
   </tr>
</table>带边框的表格

html
<table class="table table-bordered">
  ...
</table>【代码示例】
html
<table class="table table-bordered">
   <caption>可选的表格标题</caption>
   <tr>
    <th>序号</th>
    <th>姓名</th>
    <th>手机号</th>
   </tr>
   <tr>
    <th >1</th>
    <td>Mark</td>
    <td>13333333333</td>
   </tr>
   <tr>
    <th >2</th>
    <td>Jacob</td>
    <td>13333333334</td>
   </tr>
   <tr>
    <th >3</th>
    <td>Larry</td>
    <td>13333333335</td>
   </tr>
</table>表格的状态类
通过这些状态类可以为行或单元格设置颜色。
| Class | 描述 |
|---|---|
.active | 鼠标悬停在行或单元格上时所设置的颜色 |
.success | 标识成功或积极的动作 |
.info | 标识普通的提示信息或动作 |
.warning | 标识警告或需要用户注意 |
.danger | 标识危险或潜在的带来负面影响的动作 |
html
<!-- 给一整行添加状态样式 -->
<tr class="active">...</tr>
<tr class="success">...</tr>
<tr class="warning">...</tr>
<tr class="danger">...</tr>
<tr class="info">...</tr>

<!--给一个单元格添加状态样式 -->
<tr>
  <td class="active">...</td>
  <td class="success">...</td>
  <td class="warning">...</td>
  <td class="danger">...</td>
  <td class="info">...</td>
</tr>【代码示例】
html
<table class="table">
   <tr>
    <th>#</th>
    <th>Column heading</th>
    <th>Column heading</th>
    <th>Column heading</th>
   </tr>
   <tr class="active">
    <th >1</th>
    <td>Column content</td>
    <td>Column content</td>
    <td>Column content</td>
   </tr>
   <tr>
    <th >2</th>
    <td>Column content</td>
    <td>Column content</td>
    <td>Column content</td>
   </tr>
   <tr class="success">
    <th >3</th>
    <td>Column content</td>
    <td>Column content</td>
    <td>Column content</td>
   </tr>
   <tr>
    <th >4</th>
    <td>Column content</td>
    <td>Column content</td>
    <td>Column content</td>
   </tr>
   <tr class="info">
    <th >5</th>
    <td>Column content</td>
    <td>Column content</td>
    <td>Column content</td>
   </tr>
   <tr>
    <th >6</th>
    <td>Column content</td>
    <td>Column content</td>
    <td>Column content</td>
   </tr>
   <tr class="warning">
    <th >7</th>
    <td>Column content</td>
    <td>Column content</td>
    <td>Column content</td>
   </tr>
   <tr>
    <th>8</th>
    <td>Column content</td>
    <td>Column content</td>
    <td>Column content</td>
   </tr>
   <tr class="danger">
    <th >9</th>
    <td>Column content</td>
    <td>Column content</td>
    <td>Column content</td>
   </tr>
</table>响应式表格
将任何 .table 元素包裹在 .table-responsive 元素内,即可创建响应式表格,其会在小屏幕设备上(小于 768px)水平滚动。当屏幕大于 768px 宽度时,水平滚动条消失。
表单
基本实例
单独的表单控件会被自动赋予一些全局样式。所有设置了 .form-control 类的 <input>、<textarea> 和 <select> 元素都将被默认设置宽度属性为 width: 100%;。 将 label 元素和前面提到的控件包裹在 .form-group 中可以获得最好的排列。
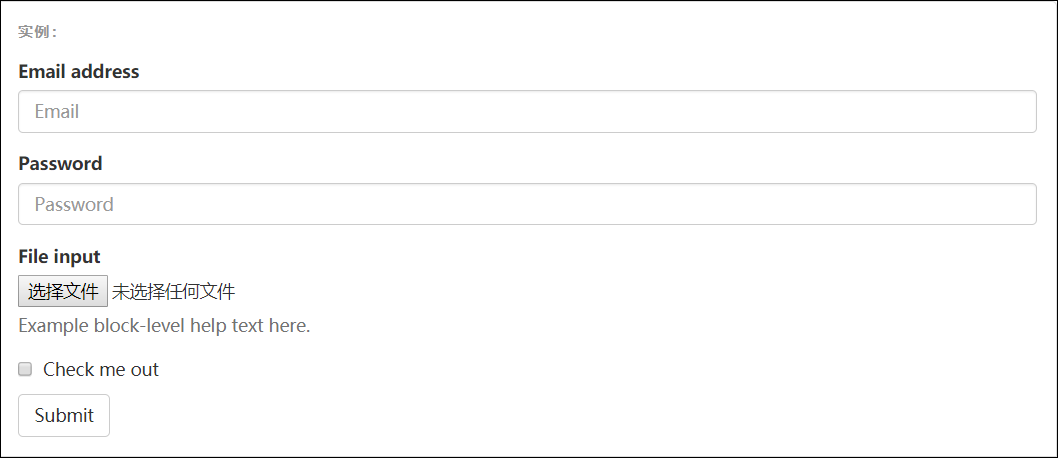
【代码示例】label 的作用:1. 表单控件的提示信息;2.用户点击文字就需要将光标聚焦到对应的表单上面;
html
<form>
  <div class="form-group">
    <label for="exampleInputEmail1">Email address</label>
    <input type="email" class="form-control" id="exampleInputEmail1" placeholder="Email">
  </div>
  <div class="form-group">
    <label for="exampleInputPassword1">Password</label>
    <input type="password" class="form-control" id="exampleInputPassword1" placeholder="Password">
  </div>
  <div class="form-group">
    <label for="exampleInputFile">File input</label>
    <input type="file" id="exampleInputFile">
    <p class="help-block">Example block-level help text here.</p>
  </div>
  <div class="checkbox">
    <label>
      <input type="checkbox"> Check me out
    </label>
  </div>
  <button type="submit" class="btn btn-default">Submit</button>
</form>不要将表单组和输入框组混合使用
不要将表单组直接和输入框组混合使用。建议将输入框组嵌套到表单组中使用。
内联表单
为 <form> 元素添加 .form-inline 类可使其内容左对齐并且表现为 inline-block 级别的控件。只适用于视口(viewport)至少在 768px 宽度时(视口宽度再小的话就会使表单折叠)。
一定要添加
label标签 如果你没有为每个输入控件设置
label标签,屏幕阅读器将无法正确识别。对于这些内联表单,你可以通过为label设置.sr-only类将其隐藏。还有一些辅助技术提供label标签的替代方案,比如aria-label、aria-labelledby或title属性。如果这些都不存在,屏幕阅读器可能会采取使用placeholder属性,如果存在的话,使用占位符来替代其他的标记,但要注意,这种方法是不妥当的。

html
<form class="form-inline">
  <div class="form-group">
    <label for="exampleInputName2">Name</label>
    <input type="text" class="form-control" id="exampleInputName2" placeholder="Jane Doe">
  </div>
  <div class="form-group">
    <label for="exampleInputEmail2">Email</label>
    <input type="email" class="form-control" id="exampleInputEmail2" placeholder="jane.doe@example.com">
  </div>
  <button type="submit" class="btn btn-default">Send invitation</button>
</form>
html
<form class="form-inline">
  <div class="form-group">
    <label class="sr-only" for="exampleInputAmount">Amount (in dollars)</label>
    <div class="input-group">
      <div class="input-group-addon">$</div>
      <input type="text" class="form-control" id="exampleInputAmount" placeholder="Amount">
      <div class="input-group-addon">.00</div>
    </div>
  </div>
  <button type="submit" class="btn btn-primary">Transfer cash</button>
</form>水平排列的表单
通过为表单添加 .form-horizontal 类,并联合使用 Bootstrap 预置的栅格类,可以将 label 标签和控件组水平并排布局。这样做将改变 .form-group 的行为,使其表现为栅格系统中的行(row),因此就无需再额外添加 .row 了。

html
<form class="form-horizontal">
  <div class="form-group">
    <label for="inputEmail3" class="col-sm-2 control-label">Email</label>
    <div class="col-sm-10">
      <input type="email" class="form-control" id="inputEmail3" placeholder="Email">
    </div>
  </div>
  <div class="form-group">
    <label for="inputPassword3" class="col-sm-2 control-label">Password</label>
    <div class="col-sm-10">
      <input type="password" class="form-control" id="inputPassword3" placeholder="Password">
    </div>
  </div>
  <div class="form-group">
    <div class="col-sm-offset-2 col-sm-10">
      <div class="checkbox">
        <label>
          <input type="checkbox"> Remember me
        </label>
      </div>
    </div>
  </div>
  <div class="form-group">
    <div class="col-sm-offset-2 col-sm-10">
      <button type="submit" class="btn btn-default">Sign in</button>
    </div>
  </div>
</form>表单支持的控件
表单布局实例中展示了其所支持的标准表单控件。
输入框
包括大部分表单控件、文本输入域控件,还支持所有 HTML5 类型的输入控件: text、password、datetime、datetime-local、date、month、time、week、number、email、url、search、tel 和 color。
必须添加类型声明
只有正确设置了 type 属性的输入控件才能被赋予正确的样式。
html
<input type="text" class="form-control" placeholder="Text input">输入控件组
如需在文本输入域 <input> 前面或后面添加文本内容或按钮控件,请参考输入控件组。
文本域
支持多行文本的表单控件。可根据需要改变 rows 属性。
html
<textarea class="form-control" rows="3"></textarea>多选和单选框
多选框(checkbox)用于选择列表中的一个或多个选项,而单选框(radio)用于从多个选项中只选择一个。
内联单选和多选框
通过将 .checkbox-inline 或 .radio-inline 类应用到一系列的多选框(checkbox)或单选框(radio)控件上,可以使这些控件排列在一行。
html
<label class="checkbox-inline">
  <input type="checkbox" id="inlineCheckbox1" value="option1"> 1
</label>
<label class="checkbox-inline">
  <input type="checkbox" id="inlineCheckbox2" value="option2"> 2
</label>
<label class="checkbox-inline">
  <input type="checkbox" id="inlineCheckbox3" value="option3"> 3
</label>

<label class="radio-inline">
  <input type="radio" name="inlineRadioOptions" id="inlineRadio1" value="option1"> 1
</label>
<label class="radio-inline">
  <input type="radio" name="inlineRadioOptions" id="inlineRadio2" value="option2"> 2
</label>
<label class="radio-inline">
  <input type="radio" name="inlineRadioOptions" id="inlineRadio3" value="option3"> 3
</label>不带label文本的Checkbox 和 radio
如果需要 <label> 内没有文字,输入框(input)正是你所期望的。 目前只适用于非内联的 checkbox 和 radio。 请记住,仍然需要为使用辅助技术的用户提供某种形式的 label(例如,使用 aria-label)。
html
<div class="checkbox">
  <label>
    <input type="checkbox" id="blankCheckbox" value="option1" aria-label="...">
  </label>
</div>
<div class="radio">
  <label>
    <input type="radio" name="blankRadio" id="blankRadio1" value="option1" aria-label="...">
  </label>
</div>下拉列表(select)
注意,很多原生选择菜单 - 即在 Safari 和 Chrome 中 - 的圆角是无法通过修改 border-radius 属性来改变的。
html
<select class="form-control">
  <option>1</option>
  <option>2</option>
  <option>3</option>
  <option>4</option>
  <option>5</option>
</select>对于标记了 multiple 属性的 <select> 控件来说,默认显示多选项。
html
<select multiple class="form-control">
  <option>1</option>
  <option>2</option>
  <option>3</option>
  <option>4</option>
  <option>5</option>
</select>按钮
可作为按钮使用的标签或元素
为 <a>、<button> 或 <input> 元素添加按钮类(button class)即可使用 Bootstrap 提供的样式。

html
<a class="btn btn-default" href="#" role="button">Link</a>
<button class="btn btn-default" type="submit">Button</button>
<input class="btn btn-default" type="button" value="Input">
<input class="btn btn-default" type="submit" value="Submit">预定义样式
使用下面列出的类可以快速创建一个带有预定义样式的按钮。

html
  <!-- 默认样式 -->
  <button type="button" class="btn btn-default">(默认样式)Default</button>

  <!-- 首选项 -->
  <button type="button" class="btn btn-primary">(首选项)Primary</button>

  <!-- 成功 -->
  <button type="button" class="btn btn-success">(成功)Success</button>

  <!-- 一般信息 -->
  <button type="button" class="btn btn-info">(一般信息)Info</button>

  <!-- 警告 -->
  <button type="button" class="btn btn-warning">(警告)Warning</button>

  <!-- 危险 -->
  <button type="button" class="btn btn-danger">(危险)Danger</button>

  <!-- 链接 -->
<button type="button" class="btn btn-link">(链接)Link</button>图片
通过为 <img> 元素添加以下相应的类,可以让图片呈现不同的形状。

html
<img src="..." alt="..." class="img-rounded">
<img src="..." alt="..." class="img-circle">
<img src="..." alt="..." class="img-thumbnail">组件
字体图标
字体图标是在 Web 项目中使用的图标字体。BootStrap 提供的组件包括字体图标、下拉菜单、导航、警告框、弹出框等更多功能。
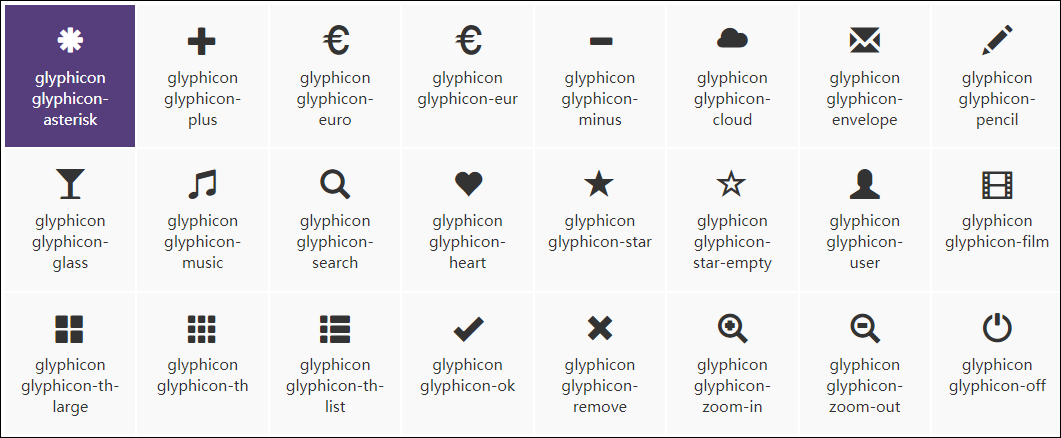
可以把它们应用到按钮、工具条中的按钮组、导航或输入框等地方。

html
<button type="button" class="btn btn-default btn-lg">
   <span class="glyphicon glyphicon-search" aria-hidden="true"></span>
  </button>

  <button type="button" class="btn btn-default" aria-label="Left Align">
    <span class="glyphicon glyphicon-align-left" aria-hidden="true"></span>
  </button>

  <button type="button" class="btn btn-default btn-lg">
    <span class="glyphicon glyphicon-star" aria-hidden="true"></span> Star
</button>下拉菜单
用于显示链接列表的可切换、有上下文的菜单。下拉菜单的 JavaScript 插件让它具有了交互性。
将下拉菜单触发器和下拉菜单都包裹在 .dropdown 里,或者另一个声明了 position: relative; 的元素。然后加入组成菜单的 HTML 代码。

html
<div class="dropdown">
  <button class="btn btn-default dropdown-toggle" type="button" id="dropdownMenu1" data-toggle="dropdown" aria-haspopup="true" aria-expanded="true">
    Dropdown
    <span class="caret"></span>
  </button>
  <ul class="dropdown-menu" aria-labelledby="dropdownMenu1">
    <li><a href="#">Action</a></li>
    <li><a href="#">Another action</a></li>
    <li><a href="#">Something else here</a></li>
    <li role="separator" class="divider"></li>
    <li><a href="#">Separated link</a></li>
  </ul>
</div>通过为下拉菜单的父元素设置.dropup类,可以让菜单向上弹出(默认是向下弹出的)。
导航条

html
<nav class="navbar navbar-default">
  <div class="container-fluid">
    <!-- Brand and toggle get grouped for better mobile display -->
    <div class="navbar-header">
      <button type="button" class="navbar-toggle collapsed" data-toggle="collapse" data-target="#bs-example-navbar-collapse-1" aria-expanded="false">
        <span class="sr-only">Toggle navigation</span>
        <span class="icon-bar"></span>
        <span class="icon-bar"></span>
        <span class="icon-bar"></span>
      </button>
      <a class="navbar-brand" href="#">Brand</a>
    </div>

    <!-- Collect the nav links, forms, and other content for toggling -->
    <div class="collapse navbar-collapse" id="bs-example-navbar-collapse-1">
      <ul class="nav navbar-nav">
        <li class="active"><a href="#">Link <span class="sr-only">(current)</span></a></li>
        <li><a href="#">Link</a></li>
        <li class="dropdown">
          <a href="#" class="dropdown-toggle" data-toggle="dropdown" role="button" aria-haspopup="true" aria-expanded="false">Dropdown <span class="caret"></span></a>
          <ul class="dropdown-menu">
            <li><a href="#">Action</a></li>
            <li><a href="#">Another action</a></li>
            <li><a href="#">Something else here</a></li>
            <li role="separator" class="divider"></li>
            <li><a href="#">Separated link</a></li>
            <li role="separator" class="divider"></li>
            <li><a href="#">One more separated link</a></li>
          </ul>
        </li>
      </ul>
      <form class="navbar-form navbar-left">
        <div class="form-group">
          <input type="text" class="form-control" placeholder="Search">
        </div>
        <button type="submit" class="btn btn-default">Submit</button>
      </form>
      <ul class="nav navbar-nav navbar-right">
        <li><a href="#">Link</a></li>
        <li class="dropdown">
          <a href="#" class="dropdown-toggle" data-toggle="dropdown" role="button" aria-haspopup="true" aria-expanded="false">Dropdown <span class="caret"></span></a>
          <ul class="dropdown-menu">
            <li><a href="#">Action</a></li>
            <li><a href="#">Another action</a></li>
            <li><a href="#">Something else here</a></li>
            <li role="separator" class="divider"></li>
            <li><a href="#">Separated link</a></li>
          </ul>
        </li>
      </ul>
    </div><!-- /.navbar-collapse -->
  </div><!-- /.container-fluid -->
</nav>缩略图
通过缩略图组件扩展 Bootstrap 的 栅格系统,可以很容易地展示栅格样式的图像、视频、文本等内容。
默认样式的实例
Boostrap 缩略图的默认设计仅需最少的标签就能展示带链接的图片。
html
<div class="row">
  <div class="col-xs-6 col-md-3">
    <a href="#" class="thumbnail">
      <img src="..." alt="...">
    </a>
  </div>
  ...
</div>自定义内容
添加一点点额外的标签,就可以把任何类型的 HTML 内容,例如标题、段落或按钮,加入缩略图组件内。
html
<div class="row">
  <div class="col-sm-6 col-md-4">
    <div class="thumbnail">
      <img src="..." alt="...">
      <div class="caption">
        <h3>Thumbnail label</h3>
        <p>...</p>
        <p><a href="#" class="btn btn-primary" role="button">Button</a> <a href="#" class="btn btn-default" role="button">Button</a></p>
      </div>
    </div>
  </div>
</div>分页

html
<nav aria-label="Page navigation">
<ul class="pagination">
<li>
<a href="#" aria-label="Previous">
<span aria-hidden="true">«</span>
</a>
</li>
<li><a href="#">1</a></li>
<li><a href="#">2</a></li>
<li><a href="#">3</a></li>
<li><a href="#">4</a></li>
<li><a href="#">5</a></li>
<li>
<a href="#" aria-label="Next">
<span aria-hidden="true">»</span>
</a>
</li>
</ul>
</nav>插件
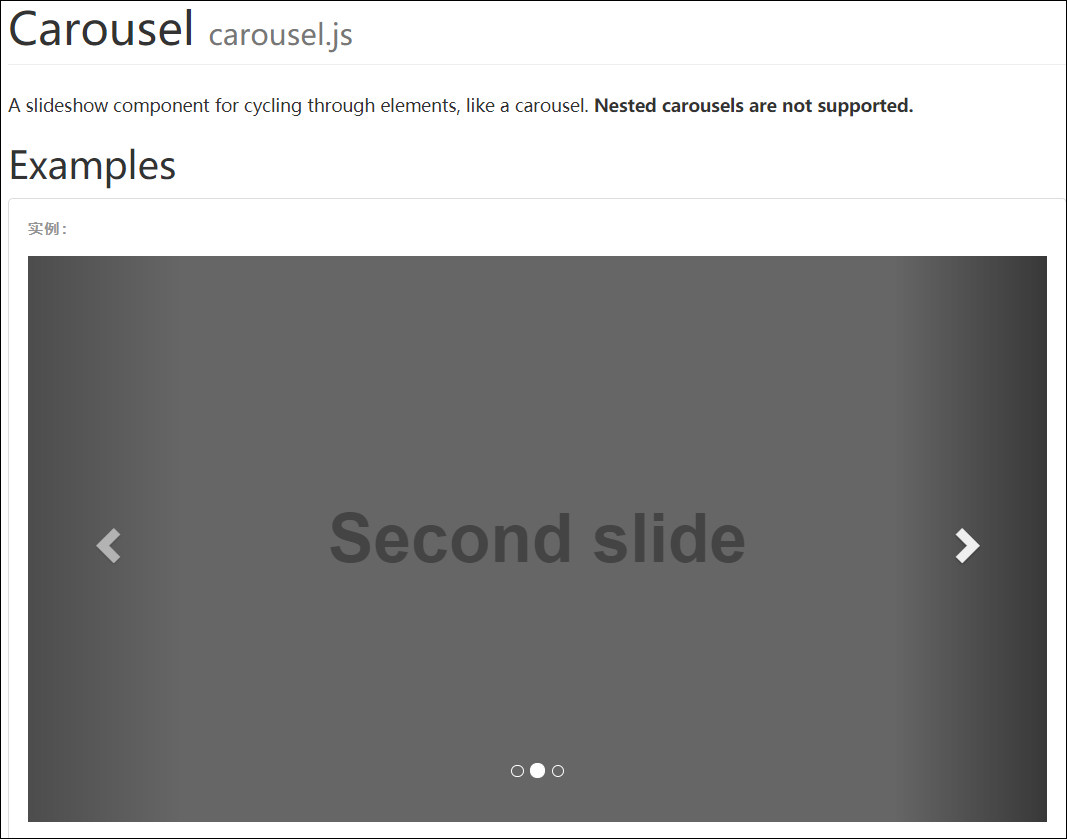
轮播图
html
<div id="carousel-example-generic" class="carousel slide" data-ride="carousel">
  <!-- Indicators -->
  <ol class="carousel-indicators">
    <li data-target="#carousel-example-generic" data-slide-to="0" class="active"></li>
    <li data-target="#carousel-example-generic" data-slide-to="1"></li>
    <li data-target="#carousel-example-generic" data-slide-to="2"></li>
  </ol>

  <!-- Wrapper for slides -->
  <div class="carousel-inner" role="listbox">
     <!-- 具体的图片信息 -->
    <div class="item active">
      <img src="..." alt="...">
      <div class="carousel-caption">
        ...
      </div>
    </div>
    <div class="item">
      <img src="..." alt="...">
      <div class="carousel-caption">
        ...
      </div>
    </div>

    <div class="item">
      <img src="..." alt="...">
      <div class="carousel-caption">
        ...
      </div>
    </div>
  </div>

  <!-- Controls -->
  <a class="left carousel-control" href="#carousel-example-generic" role="button" data-slide="prev">
    <span class="glyphicon glyphicon-chevron-left" aria-hidden="true"></span>
    <span class="sr-only">Previous</span>
  </a>
  <a class="right carousel-control" href="#carousel-example-generic" role="button" data-slide="next">
    <span class="glyphicon glyphicon-chevron-right" aria-hidden="true"></span>
    <span class="sr-only">Next</span>
  </a>
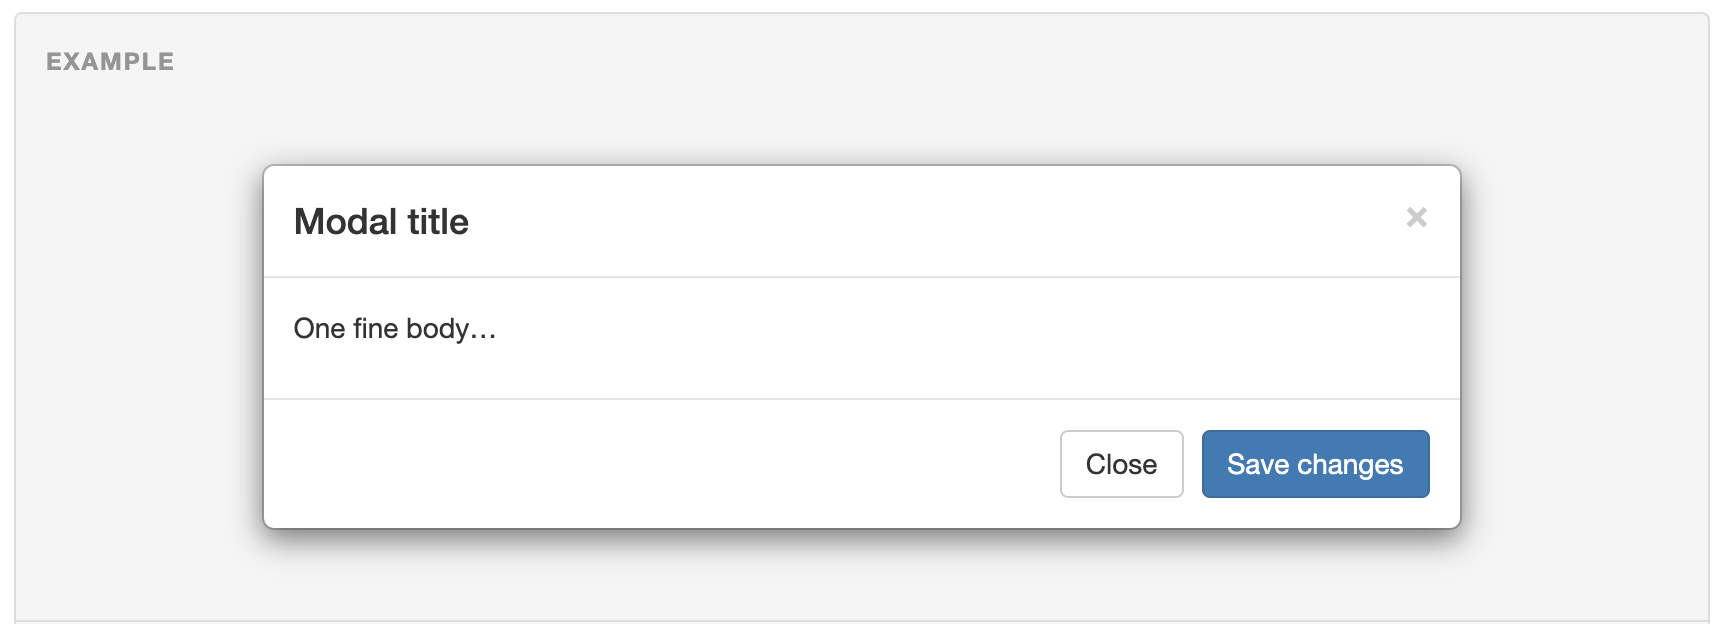
</div>模态框
html
<button type="button" class="btn btn-primary btn-lg" data-toggle="modal" data-target="#myModal">
Launch demo modal
</button>
<!-- Modal -->
<div class="modal fade" id="myModal" tabindex="-1" role="dialog" aria-labelledby="myModalLabel">
<div class="modal-dialog" role="document">
<div class="modal-content">
<div class="modal-header">
<button type="button" class="close" data-dismiss="modal" aria-label="Close"><span aria-hidden="true">×</span></button>
<h4 class="modal-title" id="myModalLabel">Modal title</h4>
</div>
<div class="modal-body">
Lorem ipsum dolor sit amet, consectetur adipisicing elit. A, accusamus amet, debitis dicta dolore eaque enim harum in natus nisi odio odit officia quis, recusandae soluta tenetur veritatis vitae voluptate?
Lorem ipsum dolor sit amet, consectetur adipisicing elit. At aut autem consequuntur cumque doloribus eum harum, illo, inventore ipsa ipsam, iusto magnam modi nihil omnis sit ullam veniam vitae voluptatum.
</div>
<div class="modal-footer">
<button type="button" class="btn btn-default" data-dismiss="modal">Close</button>
<button type="button" class="btn btn-primary">Save changes</button>
</div>
</div>
</div>
</div>学习目标总结
- 能够创建 bootstrap 的模板
- 能够使用 boostrap 的两种布局容器
- 能够查询文档创建 bootstrap 的按钮、表格、表单等常用组件
- 能够查询文档使用 bootstrap 的导航条
- 够查询文档使用 bootstrap 的轮播图
- 能够利用 Bootstrap 完成旅游网的首页